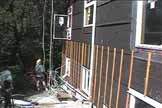
Marja and Stephen discuss which pieces of siding are needed next.
(Click on the image to see a larger version of this picture, and then use your browser's back button to return to this page.)
The preparatory work for the siding was done over a period of several months. Marja painted the siding; she repainted, and moved the pieces around, and painted, and... In March the vertical strips were added to the outside of the house. On April 15, the first parts of the window trim and the siding were put on.

Marja and Stephen discuss which pieces of siding are needed next.
(Click on the image to see a larger version of this picture, and
then use your browser's back button to return to this page.)
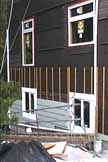
The first lengths of siding are in place.
It was soon after completing the first few pieces of siding that the priorities changed rapidly. Stephen and Marja decided to give notice on their apartment, and this meant the apartment would have to be emptied by June 1! Also, Stephen was scheduled to leave for a meeting in the US at the end of May, so there was much to move. Between 5 and 15 boxes of stuff were moved each trip, often using two cars.
[For anyone requiring some meanings here, siding = horizontal lengths of outside wall covering; shakes = split sections of wood (usually uneven), approximately 18" (40 cm) long, 4" to 10" (10 cm to 25 cm) width, and tapered lengthwise, mounted vertically with the thin edge upwards; shingles = identical panels of material, e.g. wood, various plastics.]
Additional siding has slowly been added to the south side of the house as time permitted while arranging the house with all its contents. Now much work has been done to prepare to put up the cedar shakes. The 2X4 up edging of the horizontal siding is now ready to go on and then the shakes can be added. The photo below shows the siding, the horizontal separator and the shakes.
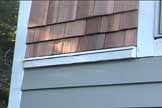
The first cedar shakes are in place above the horizontal that separates the
shakes from the siding.
The windows are carefully prepared prior to the installation of the shakes (or siding). First, peel-and-stick rubberized waterproofing is bonded around the window, sealing the sides of the window casing. Over this at the top of each window is a metal flashing, and a further piece of tar paper extending under the tar paper already there. Over this is centered a white cedar trim-board. Above this is second metal flashing which extends under the original tar paper. The sides and base of the window have white cedar trim. This was all calculated from Stephen's AutoCAD drawing and cut into the required lengths. The task of painting all these always seems to fall on Marja and the next photos show her surrounded by lengths of window trim.
The following two photos show the window trim in place. Ultimately caulking will be added between the window and the cedar trim.
|
|
August 14 was a mid-week work day on the Island. Stephen dropped Marja off at Fisherman's Cove at 6:55 a.m., and picked his Dad and Ken. Shake installation was the project for the day.
|
|
The first of these photos was taken just before lunch. 10 rows are shown, each approximately 16' (4.5 m). Each row is 6" (7.5 cm) above the previous row. The fourth photo shows the wall at the end of the day. Two additional windows now have their trim, and there are 23 rows of shakes in place.
Putting up shakes requires three people for most efficiency. The third person, the "helper", fetches and carries as required at the ground level, "and other duties as required". The latter includes getting more water (it was a very warm day!), opening and closing windows to allow people on/off the swing stage, finding materials, etc.The window trim starts with black "ice and water shield" which bonds well to the sides of the window frame, but not so well to the tar paper. At the top of the window a metal flashing is added. On top of that a strip of tar-paper is added, going underneath the next above layer of tar-paper. On top of this extra tar-paper goes the white window trim board. A further flashing is above that, again extending under the tar-paper. The shakes are brought up under the bottom edge of the window trim. The white trim is then stapled in place and the window trim is ready for caulking.
Two new people, Klay (short for Klayton Kaleta , but everyone calls him Klay) and Colin (who people can call either Colin Burke or Col), were welcomed to the house building team this weekend. After two days a significant change can be seen. The three larger windows on the right hand side have now been sealed and caulked, completing these windows. Six windows now have all their trim in place. The first photo shows Colin (left) and Clay (right).
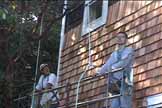
Colin and Klay - two new builders for Lot #9.
August 26 brings August almost to a close, and the south wall is almost complete. The last two small windows on the third floor have now got their trim added. There are two more rows of shakes to go on, some trim pieces separating the siding from the shakes and three windows need to be caulked. Then it will be "on to the south wall".
|
|
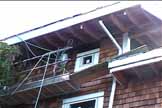
The method used to complete the area where the swing stage does not
reach.
September 9 marks the completion of the south side. There is one strip of wood to go in, but this is finished except that it needs to be narrowed by a small amount. The east wall will be the next wall to do.
Go to the second page of Siding.
Return to Passage Island Site Development History Page. or to Passage Island Lot #9 Home Page. or to Site Index Page.